The new Share menu of Google Chrome allowed users to copy links that sync the clipboard across devices using the same Google Account. The new share menu also allowed users to share links to other devices, scan the QR code, and Print the webpage. Now it looks the new share menu got another feature. Google Chrome for Android now introduced a screenshot tool. The new screenshot tool is accessible via the Share menu of Google Chrome for Android. You can access the Share menu via the Overflow menu or from the address bar. Also Read: How to Generate QR Code for URL in Google Chrome for Android
Steps to Use the New Screenshot Tool of Chrome for Android
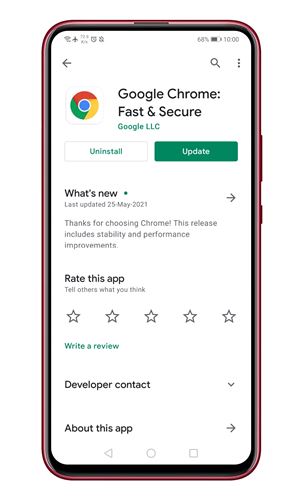
The new screenshot tool is available in Chrome 91 for Android. So, in this article, we will share a detailed guide on how to use the new screenshot tool of Chrome for Android. Let’s check out. Note: The feature is rolling out slowly to all users. So, if you cannot find the Screenshot tool in the share menu of Chrome, you need to wait for a few more days. Step 1. First of all, head to the Google Play Store and update the Google Chrome app.
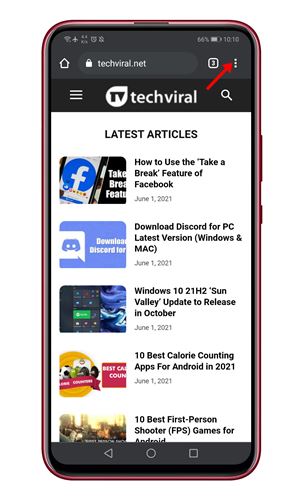
Step 2. Now open the Google Chrome browser and open the webpage which you want to capture. Step 3. Now tap on the three dots as shown in the screenshot below.
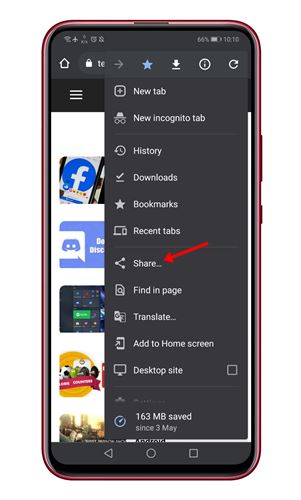
Step 4. From the menu option, tap on the ‘Share‘
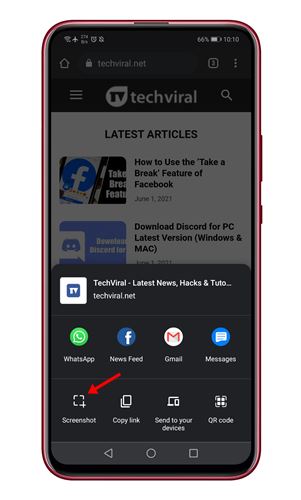
Step 5. On the Share menu, tap on the ‘Screenshot‘ option.
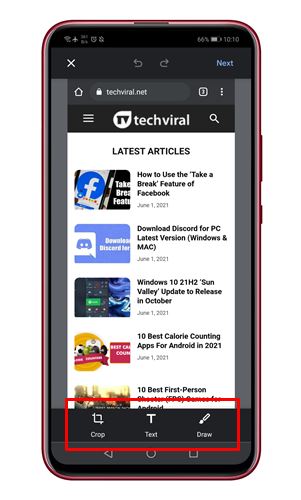
Step 6. This will open the Screenshot tool of Google Chrome. You can now crop the screenshot, add text to it, or can even draw on it.
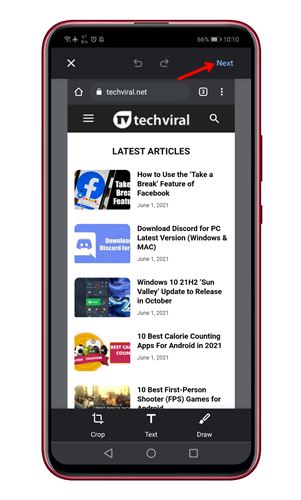
Step 7. To save the screenshot, tap on the ‘Next‘ button as shown below.
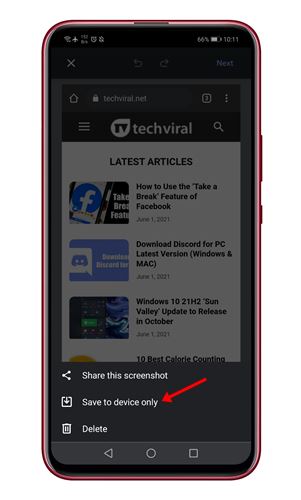
Step 8. Finally, click on the tick button and select the option ‘Save to device only.’
That’s it! You are done. This is how you can capture screenshots using Google Chrome on Android. So, this article is all about how to use the Screenshot tool of Google Chrome. I hope this article helped you! Please share it with your friends also. If you have any doubts related to this, let us know in the comment box below.
Δ
