Since Windows 11 is still under testing, users are bound to face some problems. The problems were not only limited to network errors; few users even reported the taskbar not working, night light not working, Windows Explorer restarting automatically, and so on. In this article, we are going to talk about how to troubleshoot network errors on Windows 11. Since there’s no sure-shot way to deal with network connectivity errors on Windows 11, it’s best to reset the entire network settings. Also read: How to Change Time & Date On Windows 11
Steps to Reset Network Settings in Windows 11
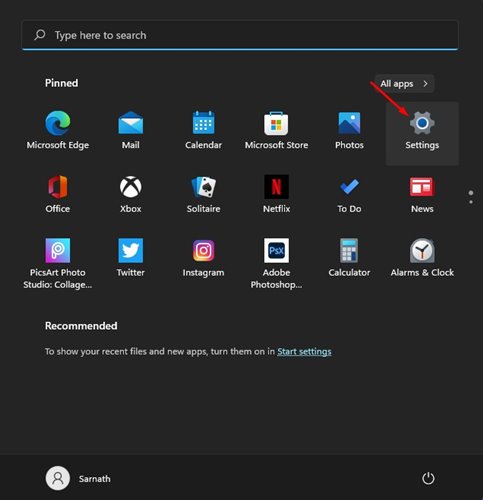
Hence, below we have shared a detailed guide on how to Reset Network Settings in Windows 11 operating system. The process is going to be very easy. Just implement the steps shared below. Step 1. First of all, open the Windows start button and click on the ‘Settings.’
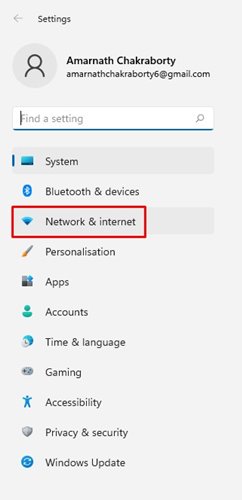
Step 2. On the Settings page, select the ‘Network & Internet’ option.
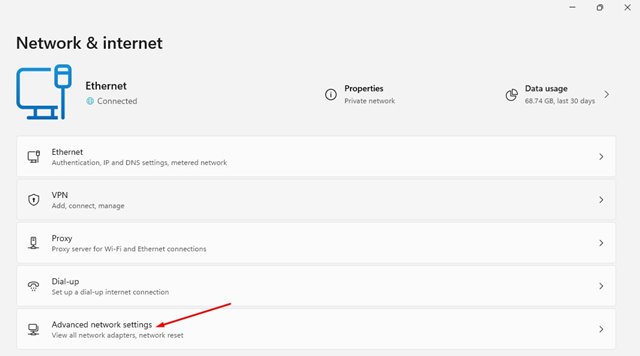
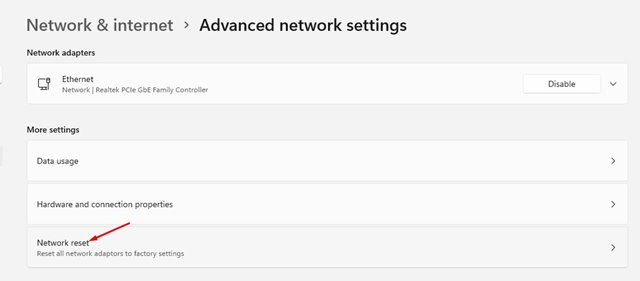
Step 3. On the Network & Internet page, click on the ‘Advanced network settings’ option.
Step 4. Under more settings, find and click on the ‘Network Reset’ option.
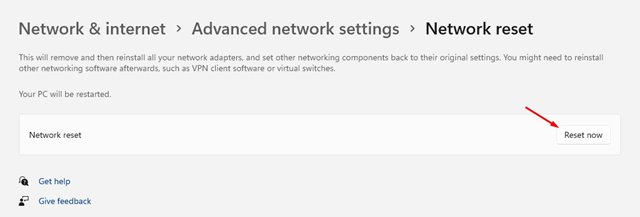
Step 5. On the next page, click on the ‘Reset now’ button behind the Network reset.
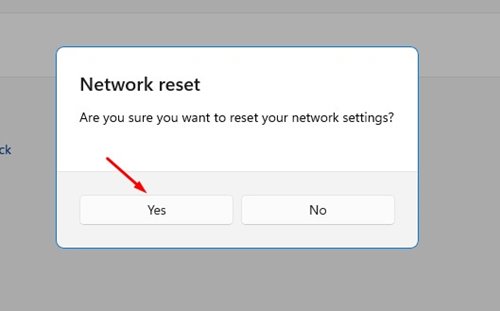
Step 6. On the confirmation pop-up, click on the ‘Yes’ button.
That’s it! You are done. This will reset the network adapters on your Windows 11 PC.
How to Fix other Network Errors?
Well, if you are experiencing problems even after resetting the network, then you need to try few other things. On techviral, we have shared a detailed guide on fixing network adapter errors. On that article, we have listed some best methods to fix Network errors. However, please note that Windows 11 is still under testing, so make sure to install the available system updates. Microsoft is fixing security issues and bugs constantly on the new Windows 11. So, this guide is all about how to reset network settings in Windows 11. I hope this article helped you! Please share it with your friends also. If you have any doubts related to this, let us know in the comment box below.
Δ
