With the Disk Management utility, you can easily manage your drives, such as hard disk drives, optical drives, flash drives, and more. You can also use it to partition, assign drive letters, and format your drives. Microsoft’s new operating system, Windows 11, also has this feature, but it’s hidden in the settings. Hence, if you are looking for ways to access the Disk Management utility on Windows 11, you are reading the right guide.
5 Best Ways to Open Disk Management on Windows 11
This article will list a few best ways to open Disk Management on Windows 11. So, let’s check out.
1) Access Disk Management From Windows 11 search
We will utilize the Windows 11 search feature to access the Disk Management tool in this method. Then, follow some of the simple steps we have shared below.
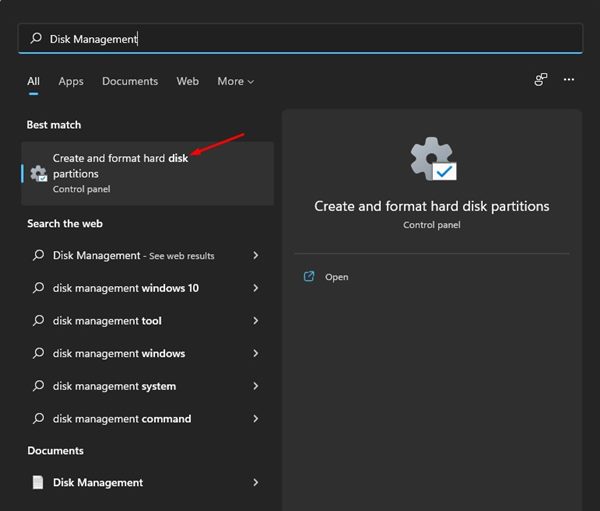
First, click on the Windows 11 search and type in Disk Management.
Click on the Create and format hard disk partitions option from the list of options.
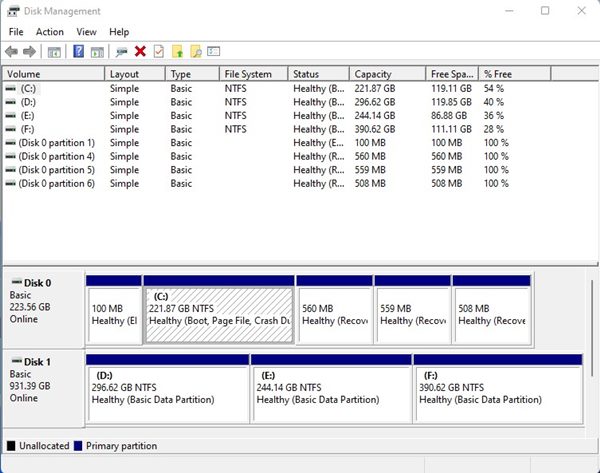
This will open the Disk Management tool on Windows 11.
That’s it! You are done. This is how you can open the Disk Management utility on Windows 11 via search.
2) Using the Windows 11 Power Menu
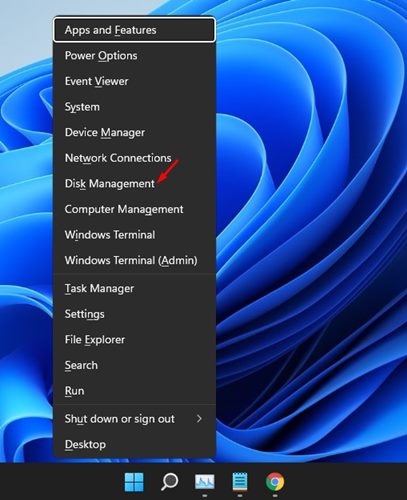
Well, Windows 11 includes a secondary Start menu that is known as Power Menu. You can use the Power Menu to access the Disk Management utility directly. To access the Power Menu in Windows 11, you need to press the Windows Key + X button.
Alternatively, you can right-click on the Windows 11 Start button to open the Power Menu. Then, click on Disk Management on the Power Menu to open the tool.
3) Access Disk Management via Computer Management Menu
Another easy way to access Disk Management is through the Computer Management tool. The Computer Management tool on Windows 11 provides you access to various tools in one place. Here’s how you can access disk management via the computer management menu.
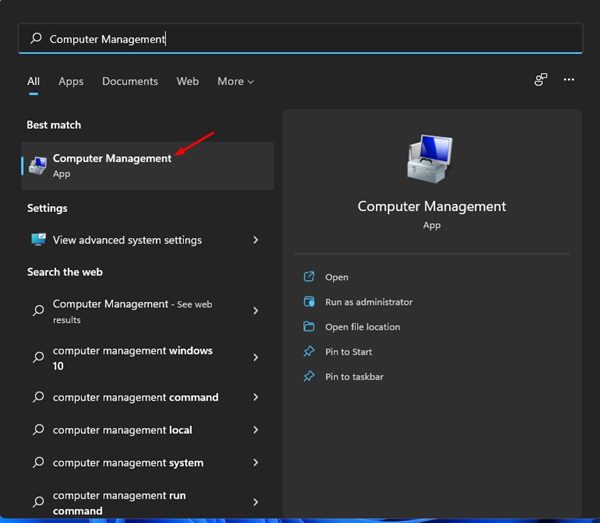
First, click on the Windows 11 Search and type in Computer Management. Next, open the Computer Management tool from the list.
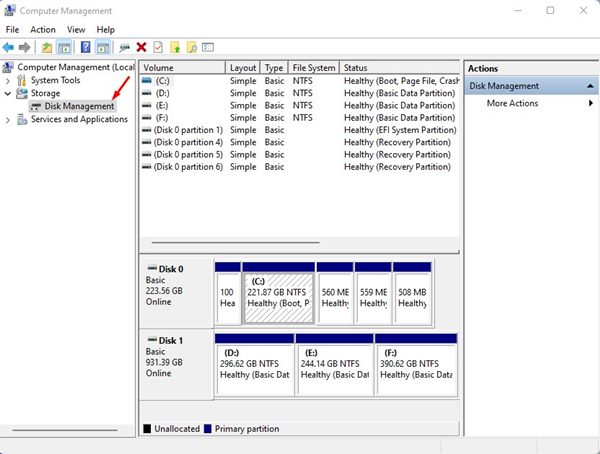
On the right, expand the Storage section and click on Disk Management.
That’s it! You are done. Now you will see the Disk Management tool on the Computer Management utility.
4) Access Disk Management via RUN command
We will use the RUN dialog box to access the Disk Management utility in this method. Here are some of the simple steps you need to follow.
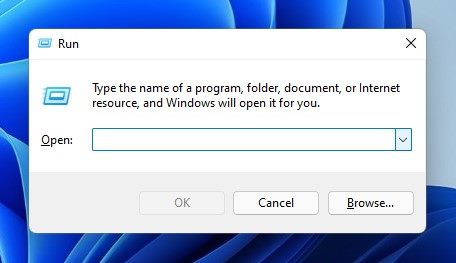
First, press the Windows Key + R button to open the RUN dialog box.
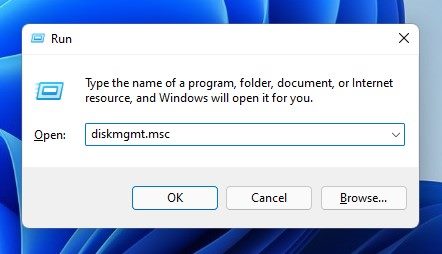
On the RUN dialog box, type in diskmgmt.msc and hit the Enter button.
This will open the Disk Management utility on Windows 11. That’s it! You are done. This is how you can access the Disk Management utility on Windows 11 via the RUN dialog box.
5) Access Disk Management via Command Prompt
Like the RUN menu, you can also utilize the Command Prompt utility to access the Disk Management tool. Here are some of the simple steps you need to follow.
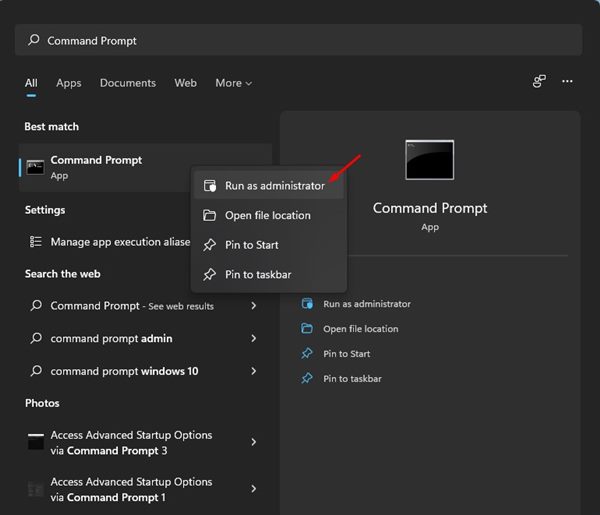
First, open the Windows 11 search and type in Command Prompt. Right-click on the Command Prompt and select Run as administrator.
On the Command Prompt window, enter diskmgmt.msc and hit the Enter button.
That’s it! You are done. This will immediately open the Disk Management utility on your Windows 11 operating system. These are various ways to access the Disk Management utility on Windows 11. I hope this article helped you! Please share it with your friends also. If you have any doubts about this, let us know in the comment box below.
Δ
