Disk Partition can be created in multiple ways. You can also use any third-party Partition Software to make your task easy.
Steps To Make Partition In Windows 10 or 11 Without Any Software
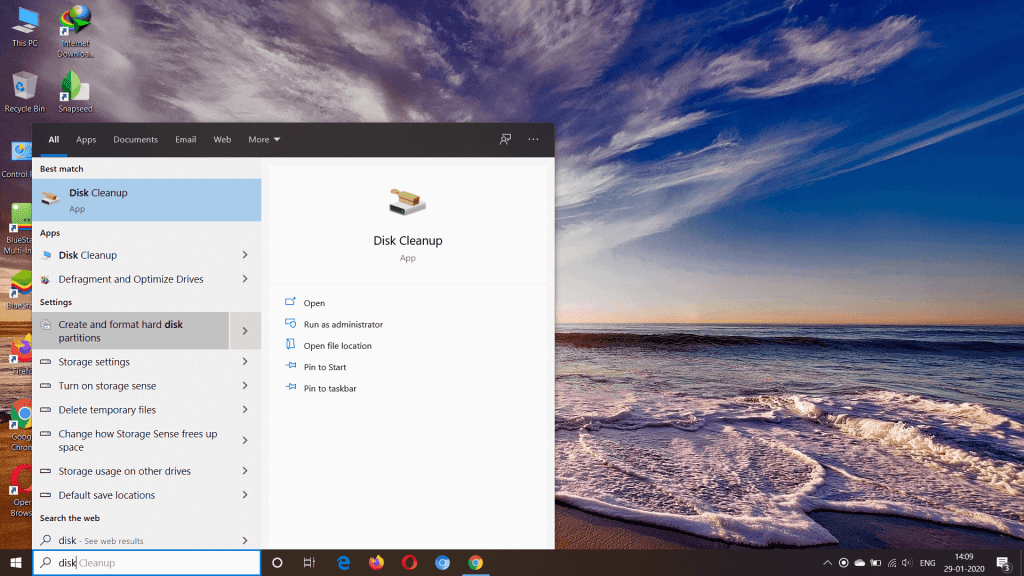
Still, we will not recommend you go with software because Windows 10 allows you to create a new partition with the system program called Disk Management Tool. Here are the complete instructions. Step 1. First of all, open Windows search and type in “Disk Management Tool“. Next, click on the “Create & Format Disk Partition,” as shown in the image.
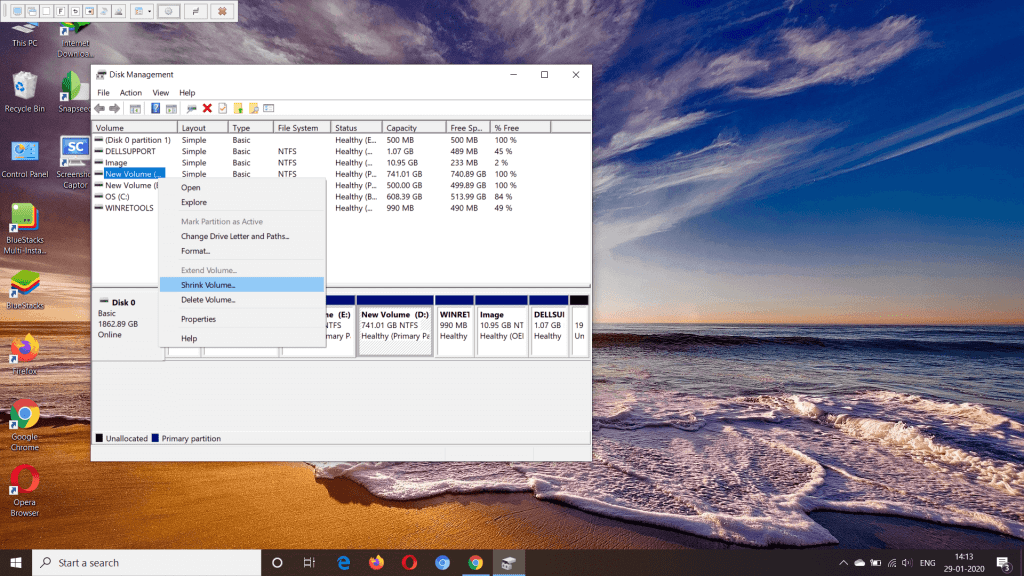
Step 2. Now you will see the interface as shown in the image. First, select and right-click on the primary disk from which you want to create a new partition. Next, click on “Shrink Volume.”
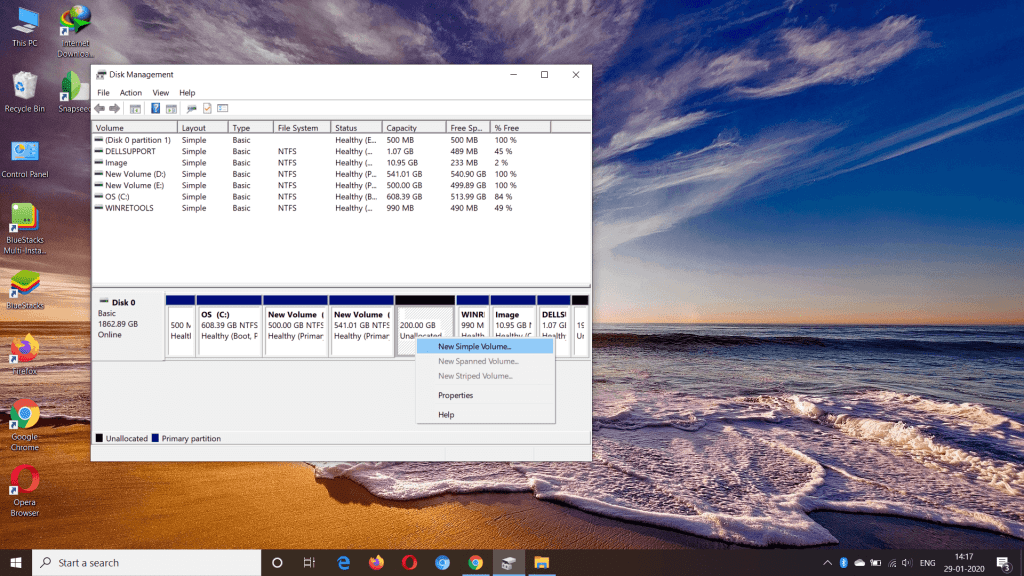
Step 3. In the editable box, enter the Size of the Disk, which you want to allocate to the new partition. Next, click on the “Shrink” button, and you will find a new Partition in the Disk Management Tool with the name “Unallocated Partition.” Step 4. Right Click on the Unallocated partition and select the option ‘New Simple Volume’
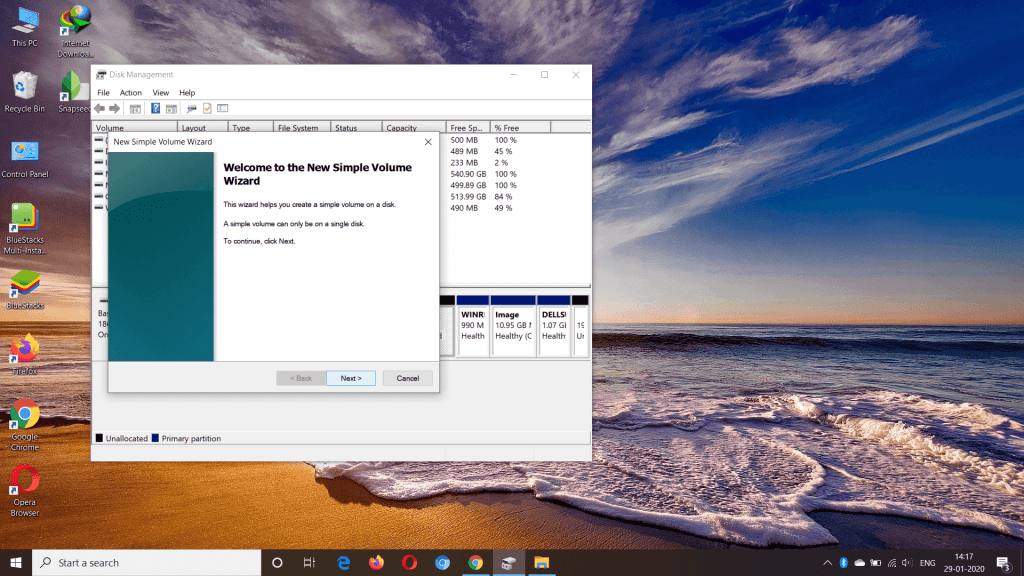
Step 5. On the following Window, click on the ‘Next‘ button.
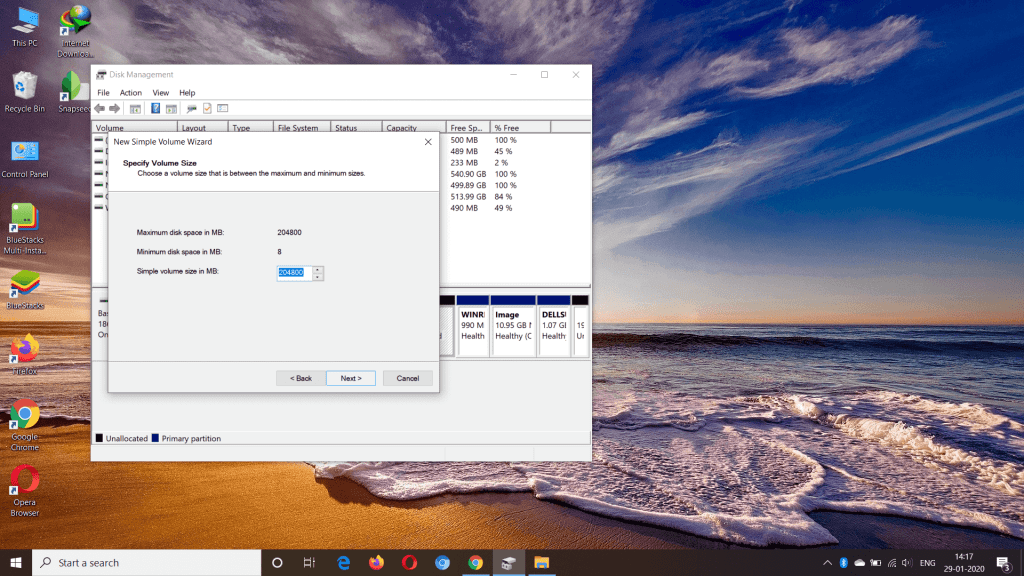
Step 6. Next, enter the amount of storage and click on Next.
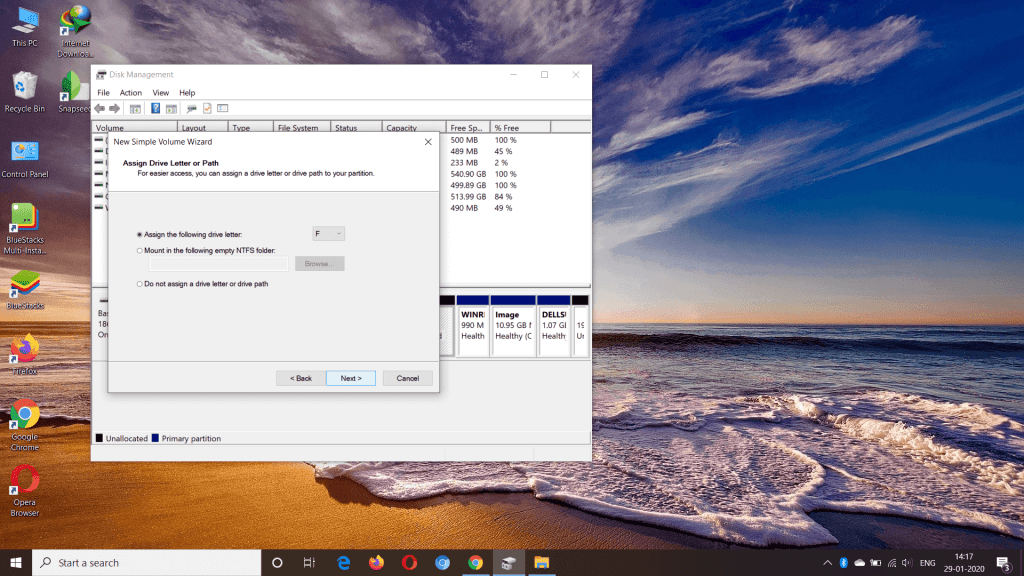
Step 7. Now you will be asked to assign a new drive letter. Just select the letter and click on the ‘Next’ button.
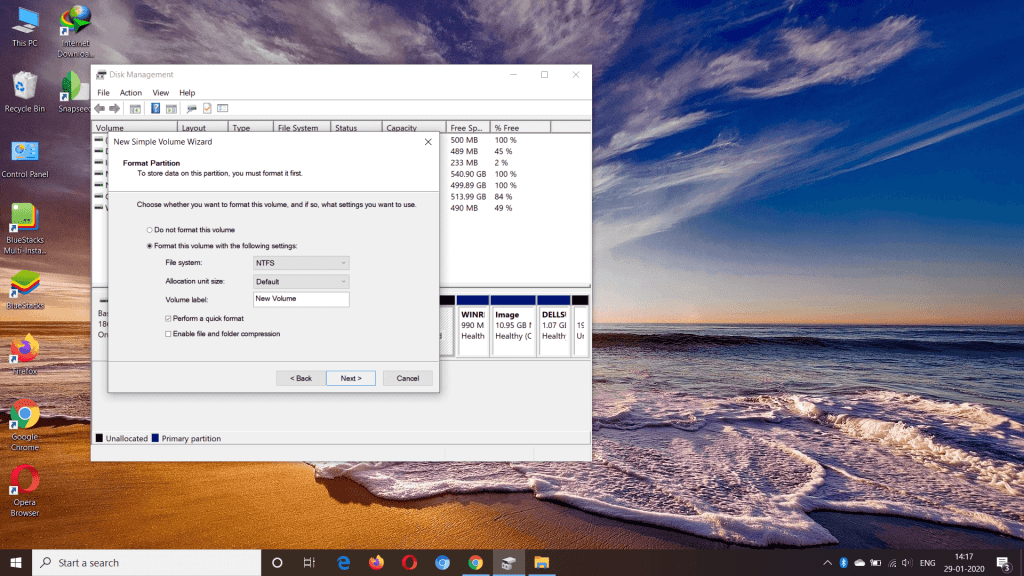
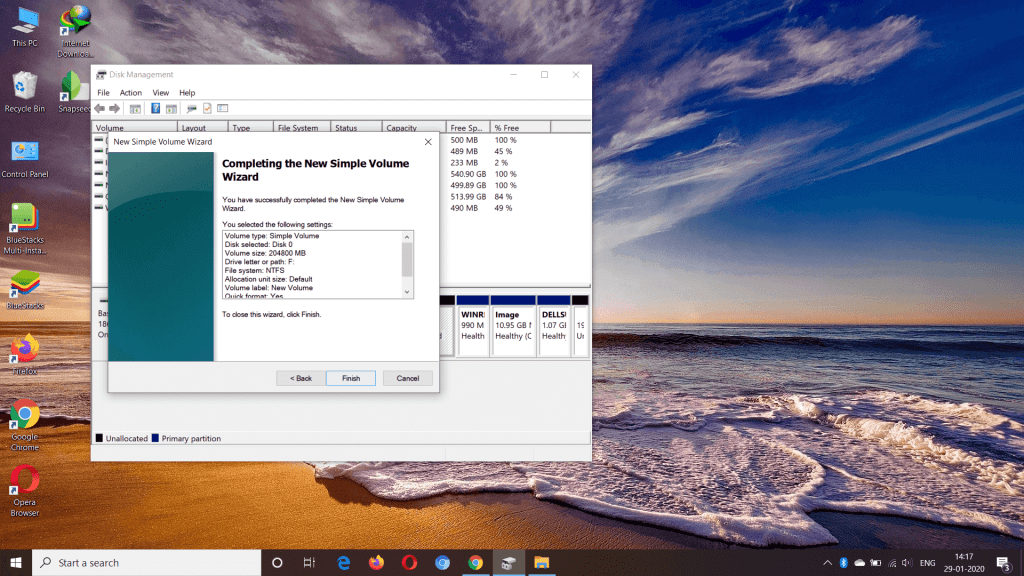
Step 8. Now you need to format the new partition. Just select the file system, volume label and click on the ‘Next‘ button.
Step 9. On the final Window, click on the Finish button.
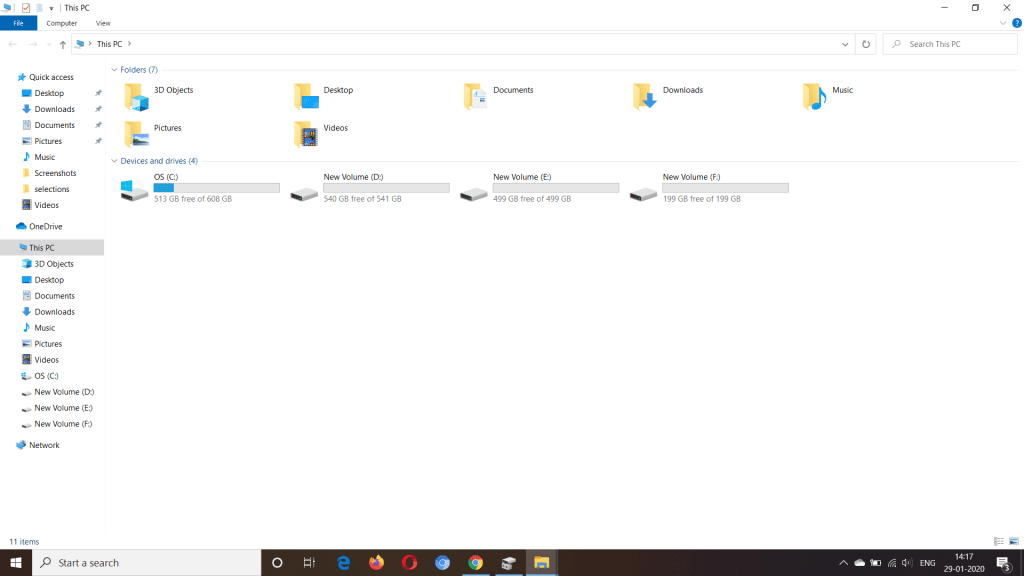
That’s it! You are done. You will find the newly created partition on the File Explorer.
So, this guide is all about how to make a partition in Windows 10 without any software. I hope this article helped you! Please share it with your friends also. If you have any doubts related to this, let us know in the comment box below.
Δ
